Abstract:
This technical article will guide the reader through an IBM Guardium v9.5 VM installation and focus on some of the more obvious do’s and don’ts. If nothing else, if this is your first time installing Guardium this article will save you hours of head scratching. Note that there are no easily accessible trials for IBM Guardium however the IBM Part Numbers have been referenced to ease location of the required software.
Content:
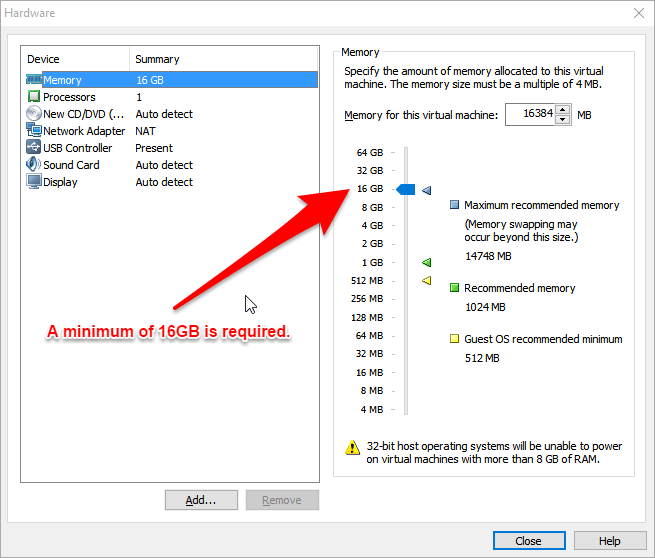
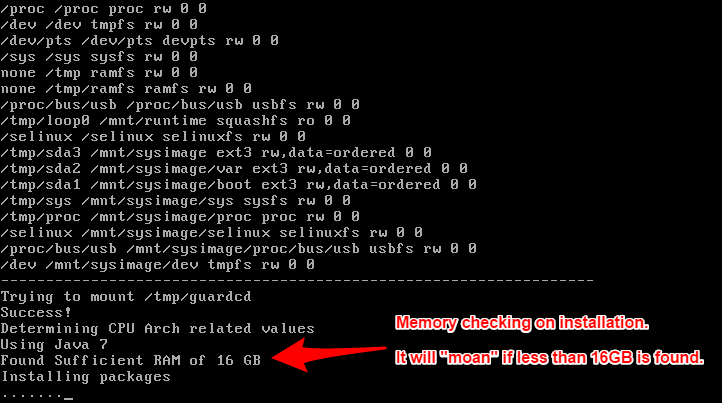
In this guide, IBM Guardium will be installed on a VMWare Virtual Machine. Guardium has some fairly high memory requirements, looking for a minimum of 16GB – however, it can be run in this demonstration environment with less.
Installation Phase 1: Preparing the Environment
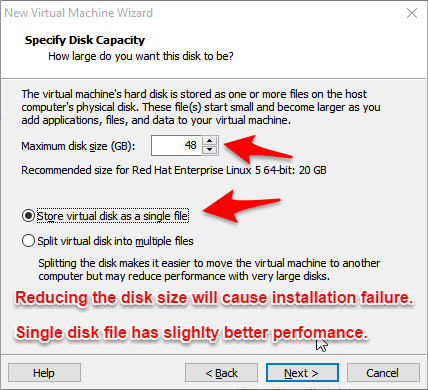
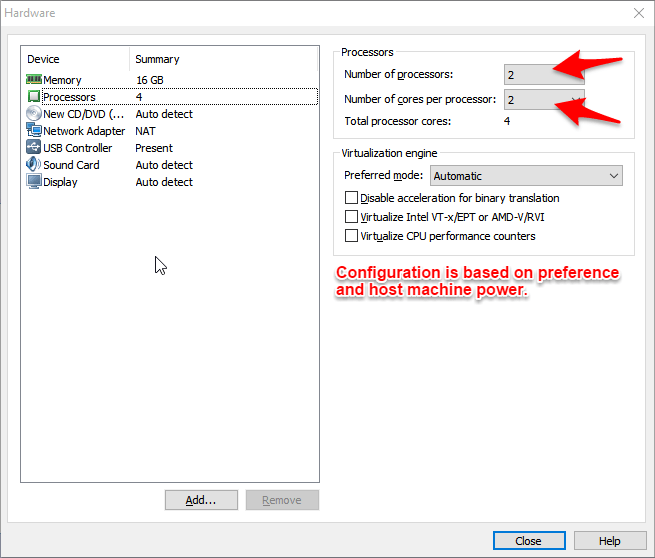
Minimum System Requirements: VMware Hardware:- 4 vCPU’s
- 16GB RAM
- 48GB Disk
- VMWare Workstation/Player here
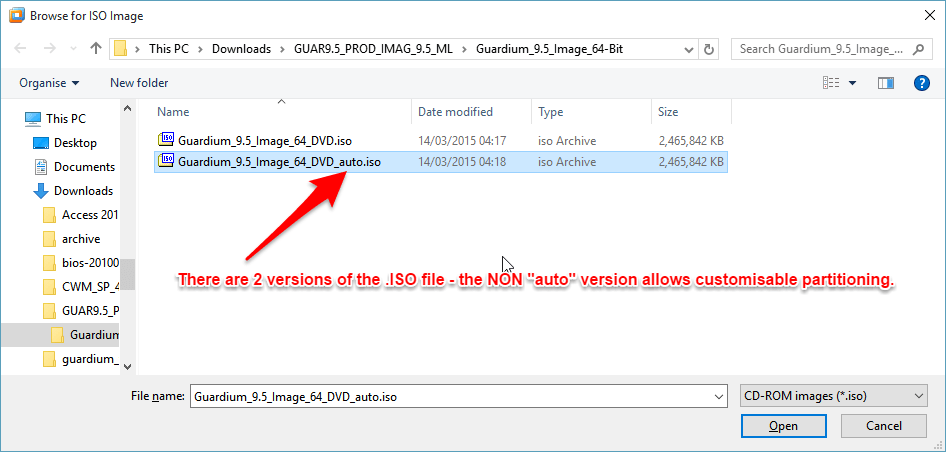
- IBM InfoSphere Guardium – 64Bit Product v9.5 Multilingual Multiplatform (CN45JML)
- IBM InfoSphere Guardium V9.5 – Collector Base Product Key Multiplatform Multilingual (CN45NML)
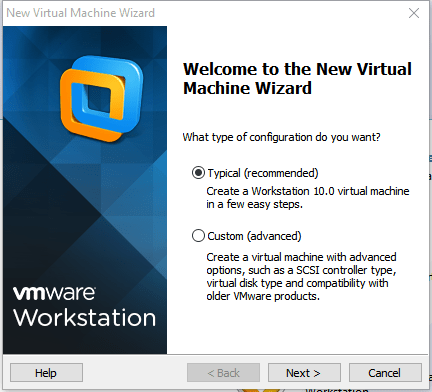
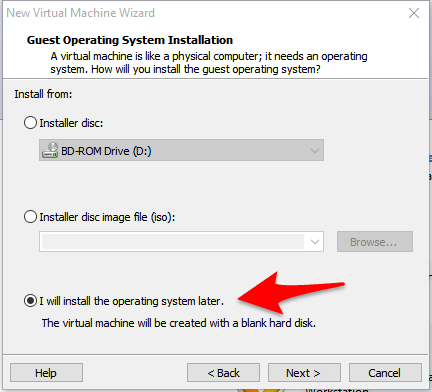
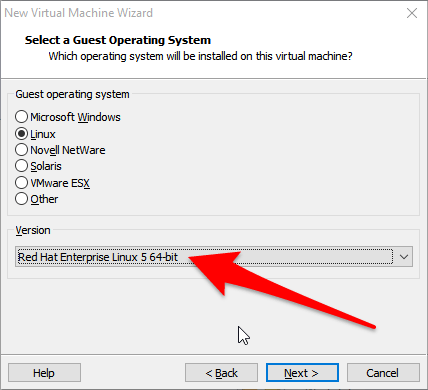
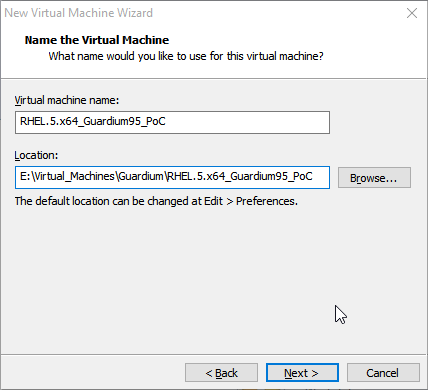
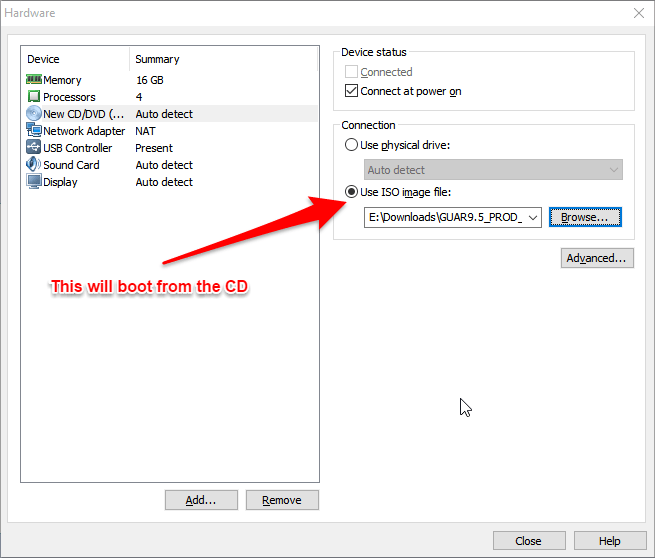
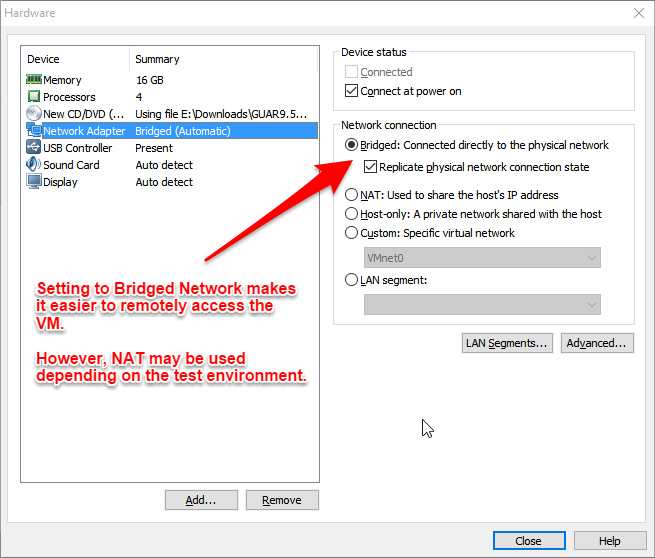
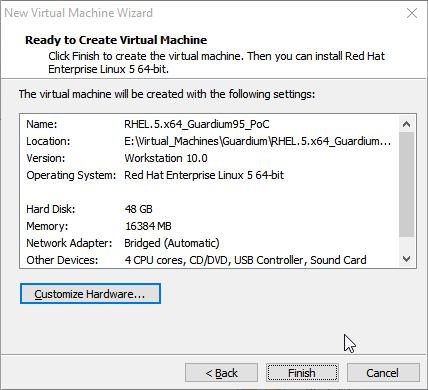
The collection of screen shots below shows this process and definition of the hardware specification:

Installation Phase 2: IBM Software Installer
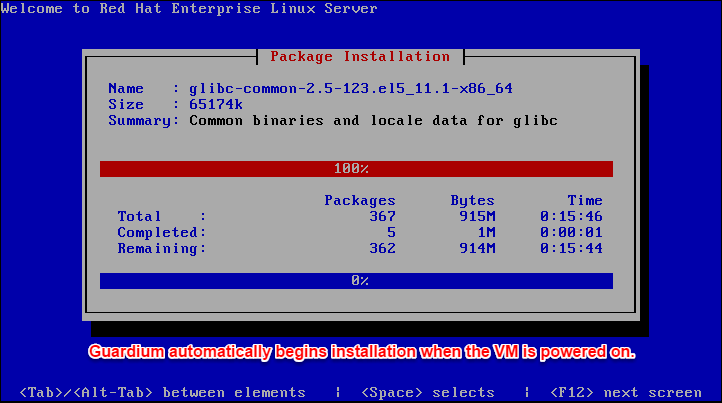
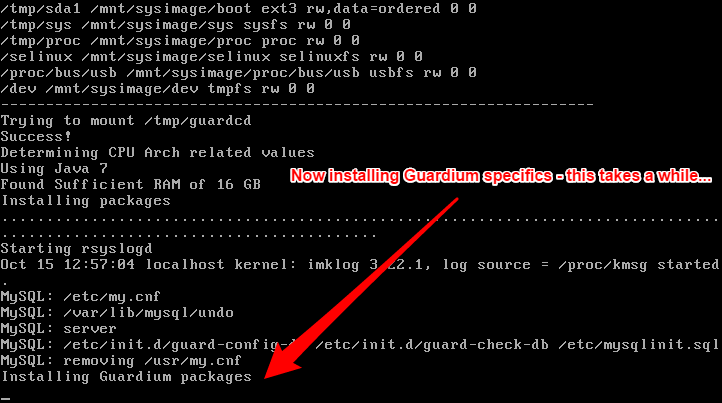
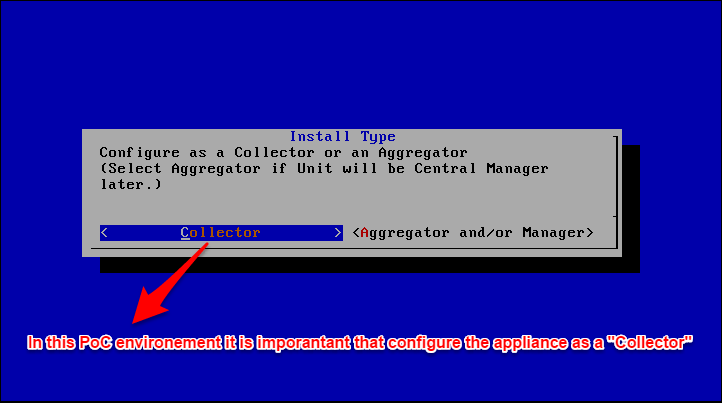
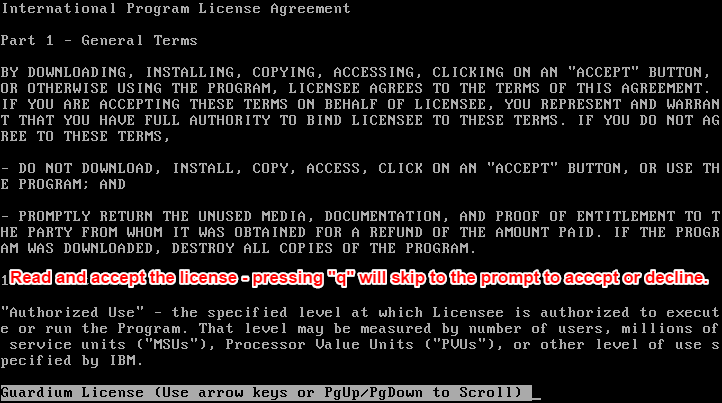
Once the VM has been defined, we are ready to power on, which will boot from the CD and load the ISO (Guardium image) we have chosen and begin the installation.The next collection of screens shows the various stages of the Guardium installation, this process will take 15-20mins depending on the configuration of the VM.
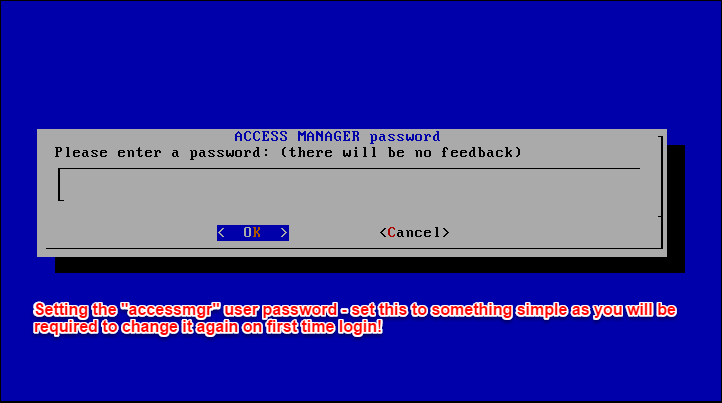
Installation Phase 3: Configuring and Licensing Guardium
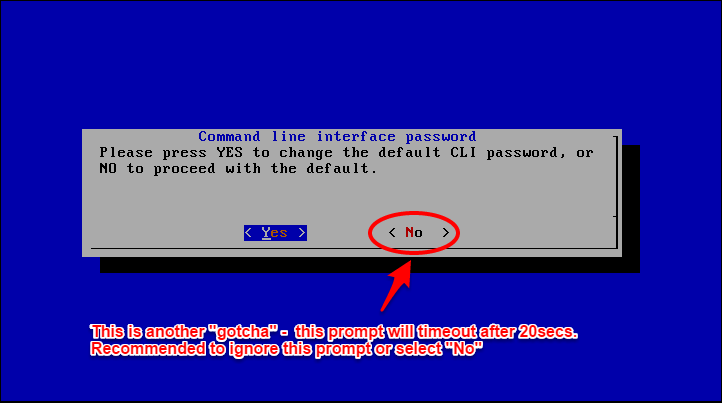
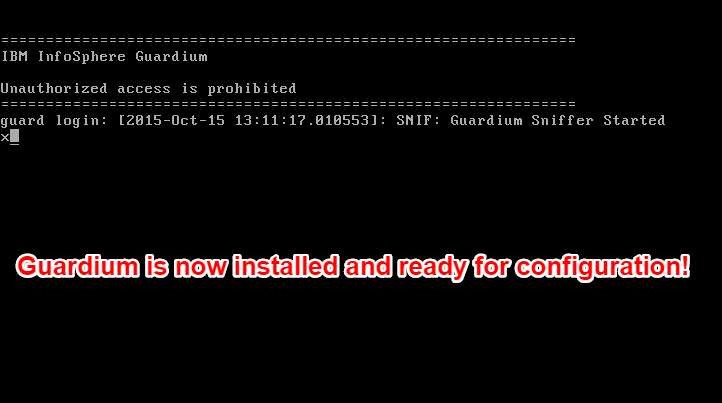
Congratulations! You’ve (hopefully) successfully installed Guardium V9.5. At this point the system is still useless, we now need to perform some configuration of the system. Firstly log in using “cli” and the default password “guardium” (unless you changed this during the installation). You will be immediately required to change this password.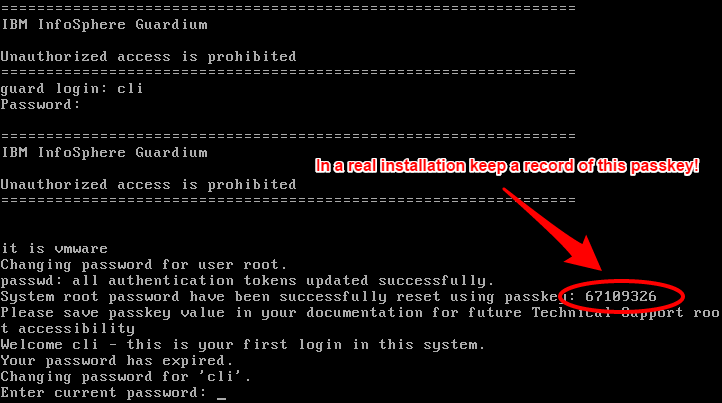
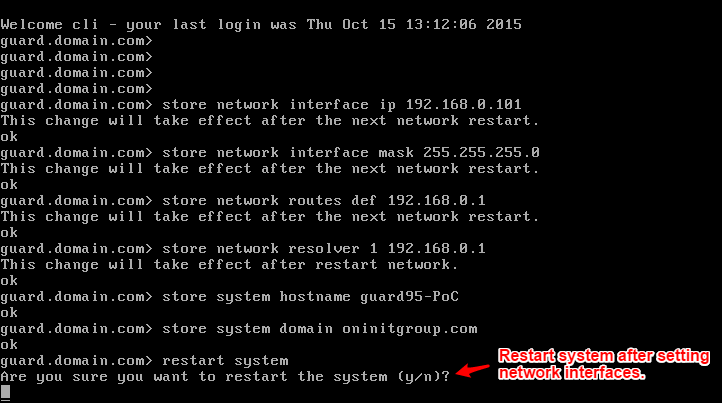
Once the password has been changed and you have successfully logged in as “cli” we can begin configuring Guardium. The “cli” user is the Guardium equivalent of “root”, there is no access to the underlying RHEL OS, however, IBM Technical Support can access this using the unique passkey provided on first login. The commands listed below are what need to be configured – these have accompanying screenshots, but this list will serve as a good reference: The following commands will configure the network interface
Wait for the system to restart and log in again with “cli” The above has configured a single NIC, BRIDGE in this case. Verify the network works:Copy to Clipboard
Optionally we could have added a second NIC – NAT perhaps; the below shows how to add a secondary network interface to GuardiumCopy to Clipboard
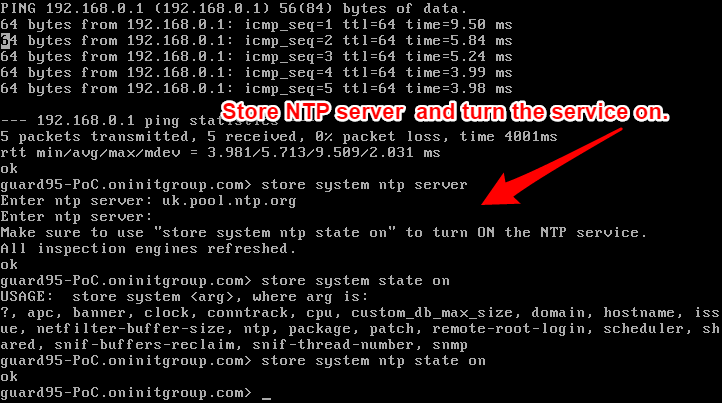
Lastly we need to set up NTP and the timezoneCopy to Clipboard
Here we firstly configure the network interface along with the host and domain name – once these are configured a system restart is required.Copy to Clipboard
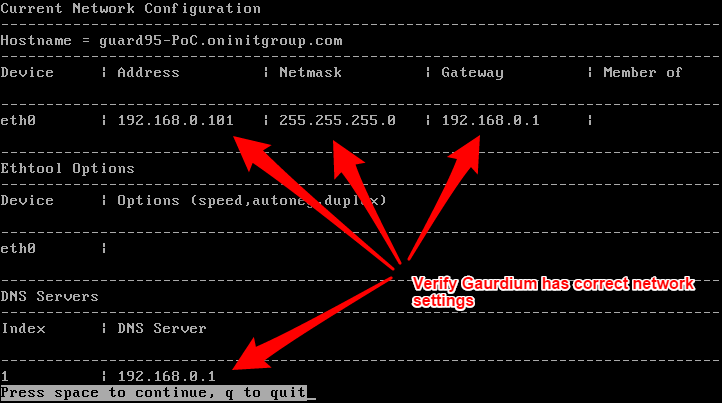
Once Guardium is back up, log in and verify that the settings are correct:
If everything looks correct (as above) – perform a ping to a machine on the same network or the gateway.
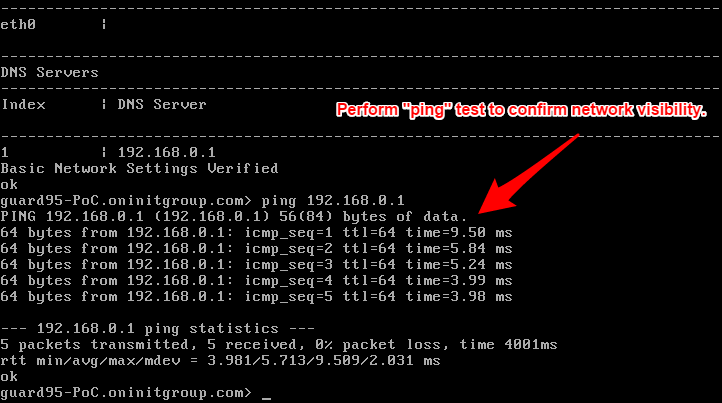
We can also test a ping to the Guardium appliance from another machine which should also work. Next up we set NTP and the Timezone.
Here I have used a single NTP server (“uk.pool.ntp.org”) with the option of adding multiple NTP servers.
To select an alternative timezone to “Europe/London” use the following command:
store system timezone list and use “shift + pgup/pgdown” to view available options.

Once the TimeZone service has been restarted – I would recommend restarting Guardium for a final time.
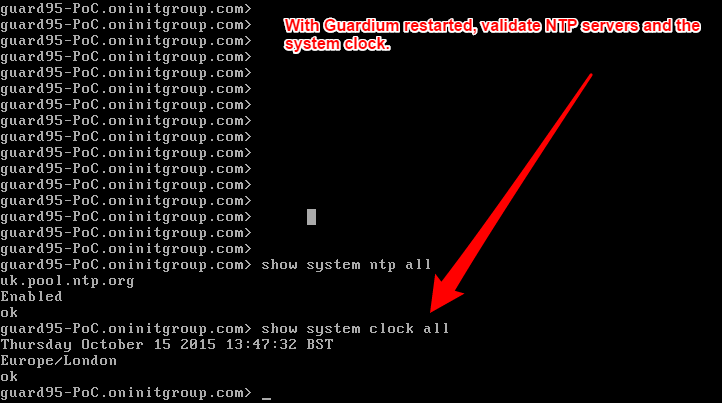
When it has successfully restarted, validate the NTP and TimeZone settings.
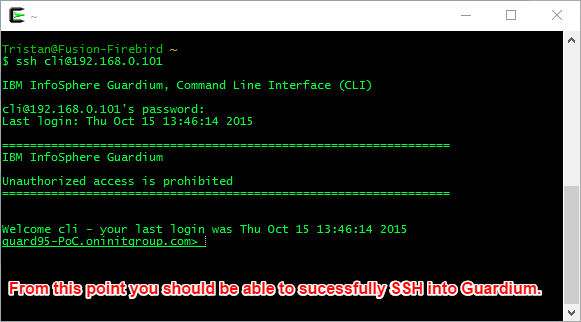
At this stage (and technically as soon as the network interface has been configured) you can continue to access the Guardium CLI using SSH.
Now we’re onto the final step in this guide – licensing Guardium. This can be achieved via the CLI or the GUI, we will focus on the GUI in this example.
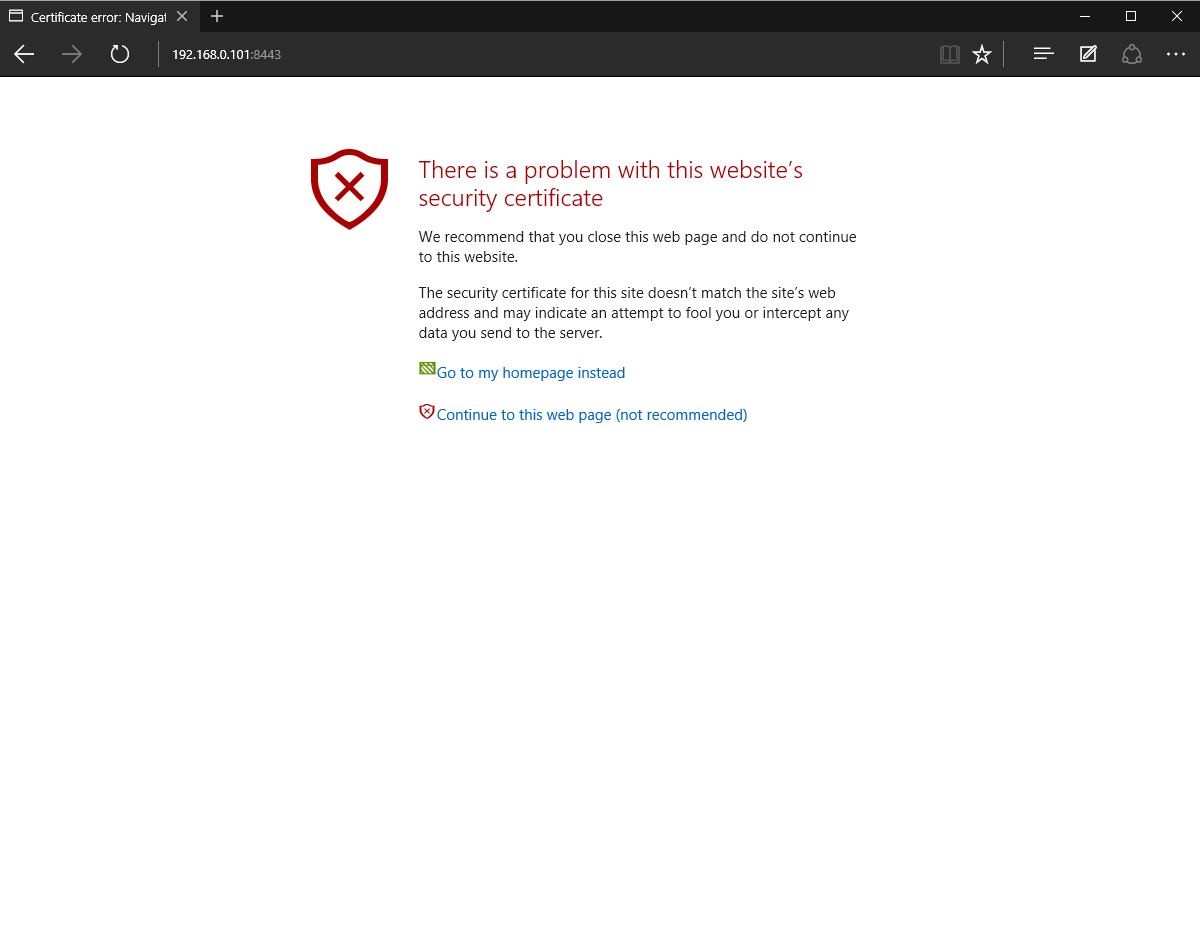
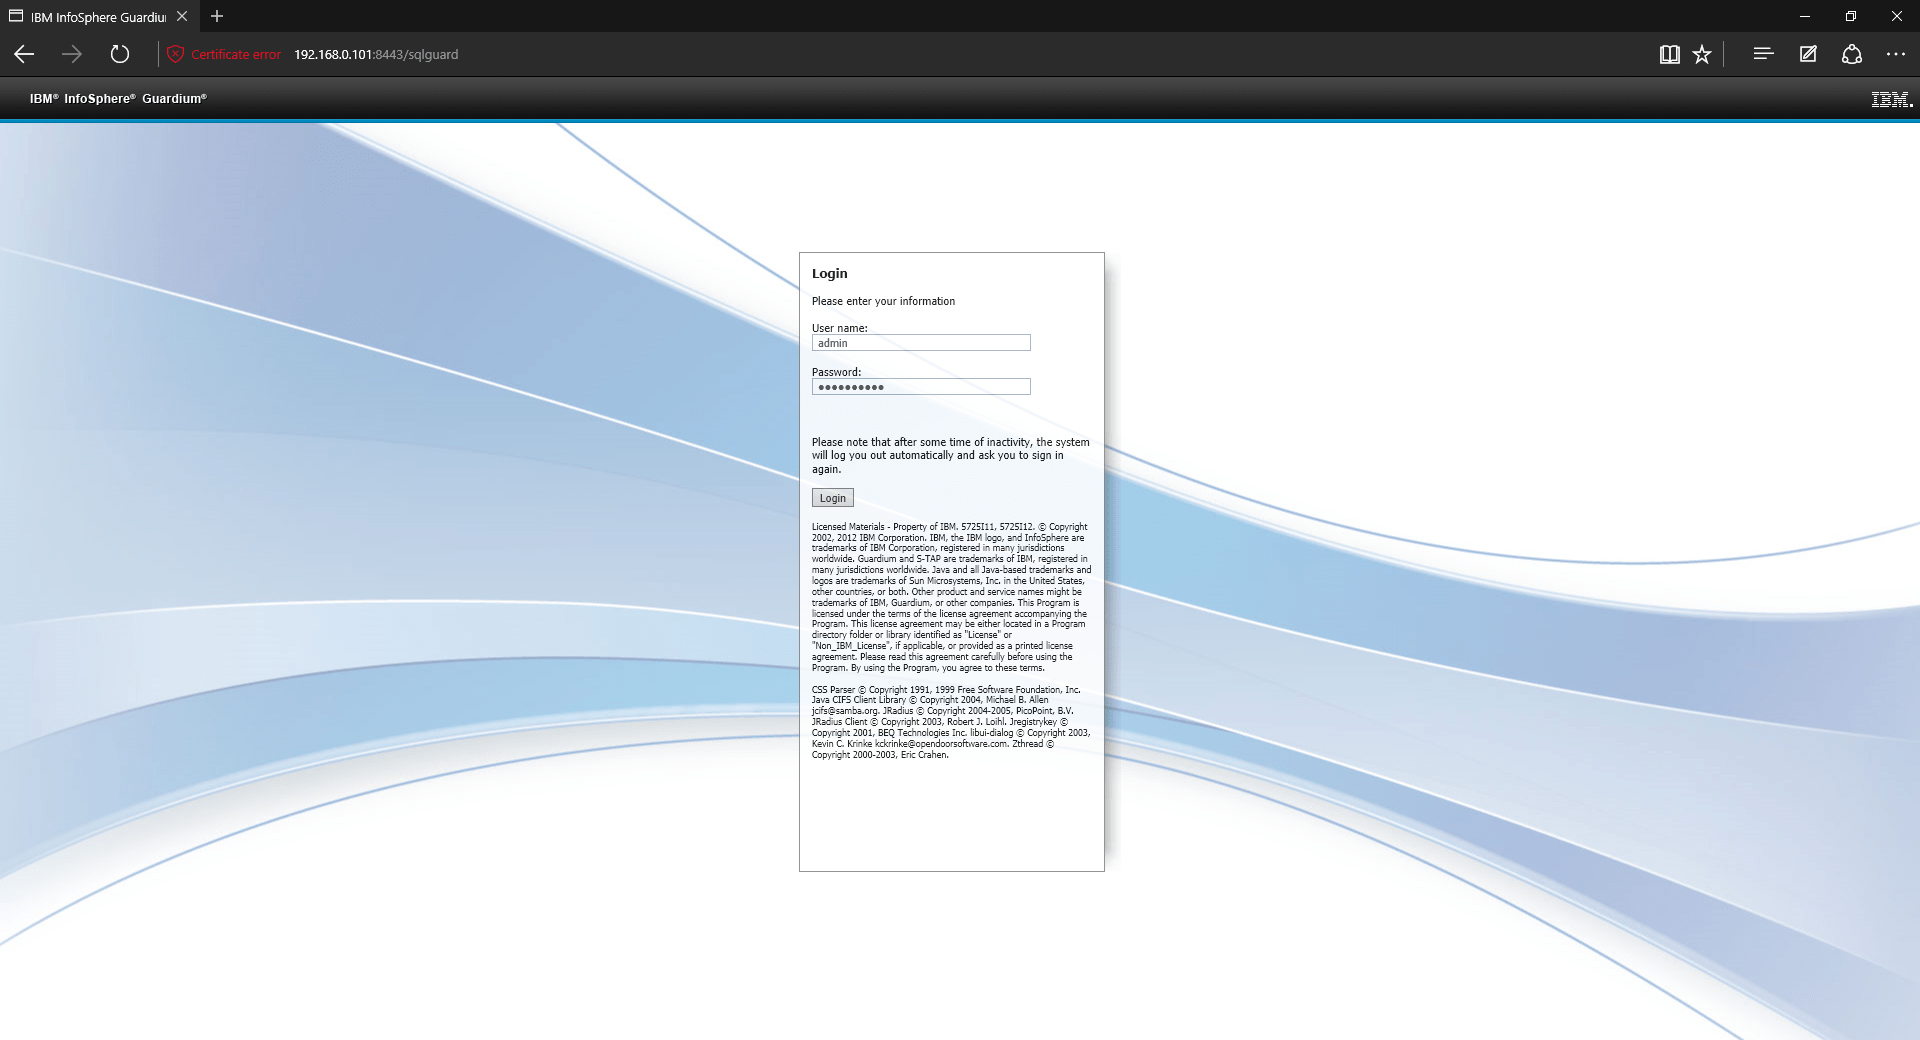
With Guardium running – open a browser and head to the address https://:8443 – in my example https://192.168.0.101:8443.
You will be presented with a certificate error – bypass this and click “Continue to this web page…”
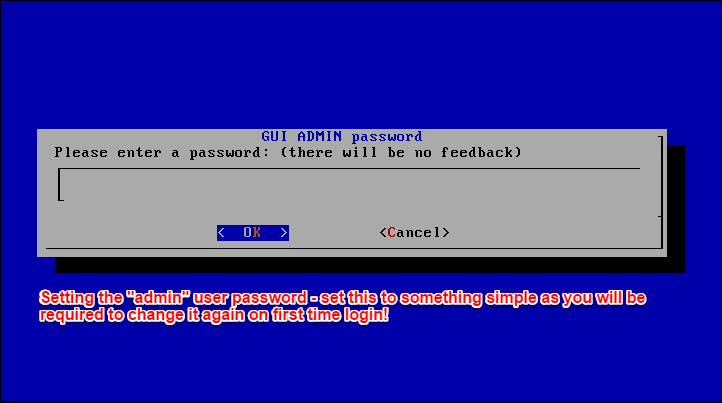
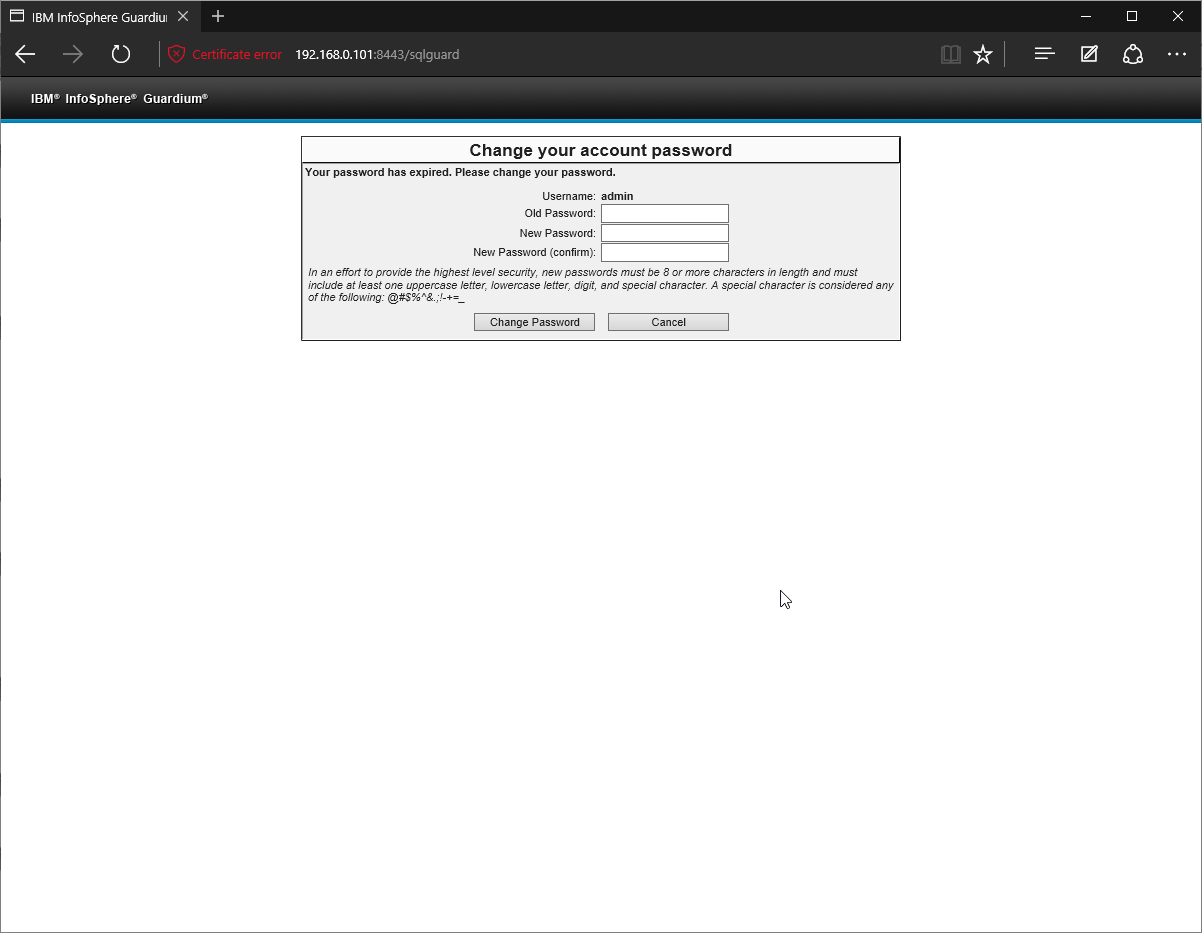
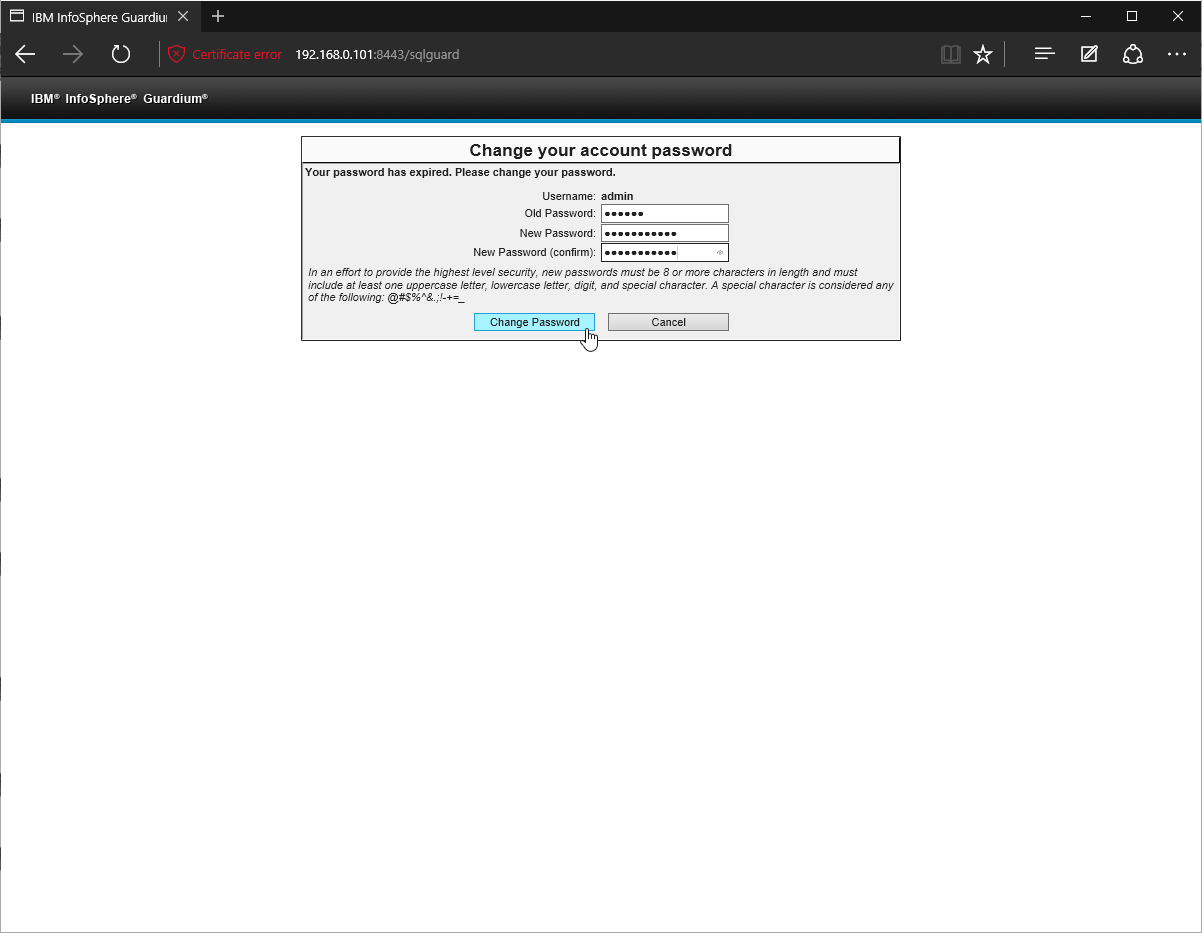
Login with the user “admin” – which is the “GUI ADMIN” user you set the password for during the installation. Once authenticated you will be required to change your password.
Finally you are presented with the default admin user layout. Here we can see that Guardium is not yet licensed.
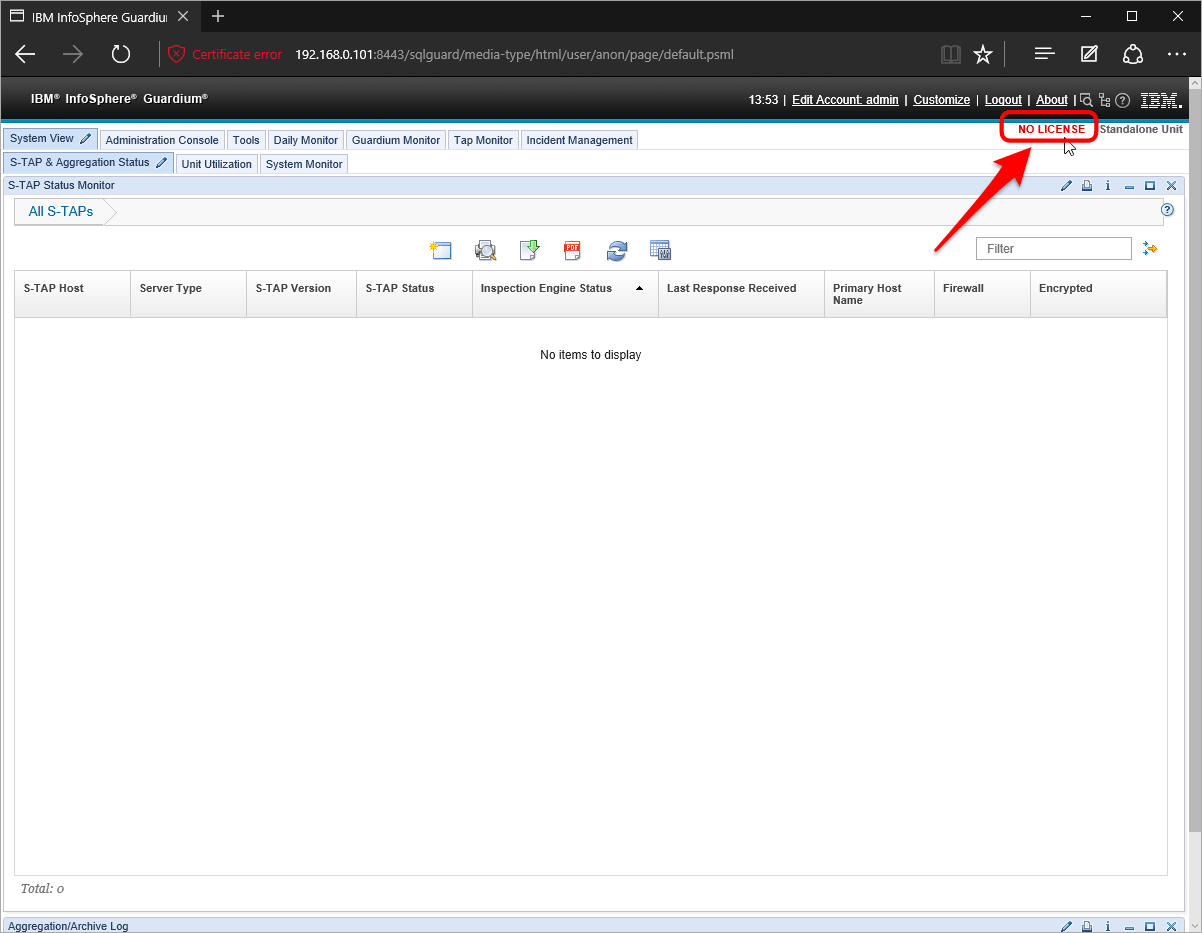
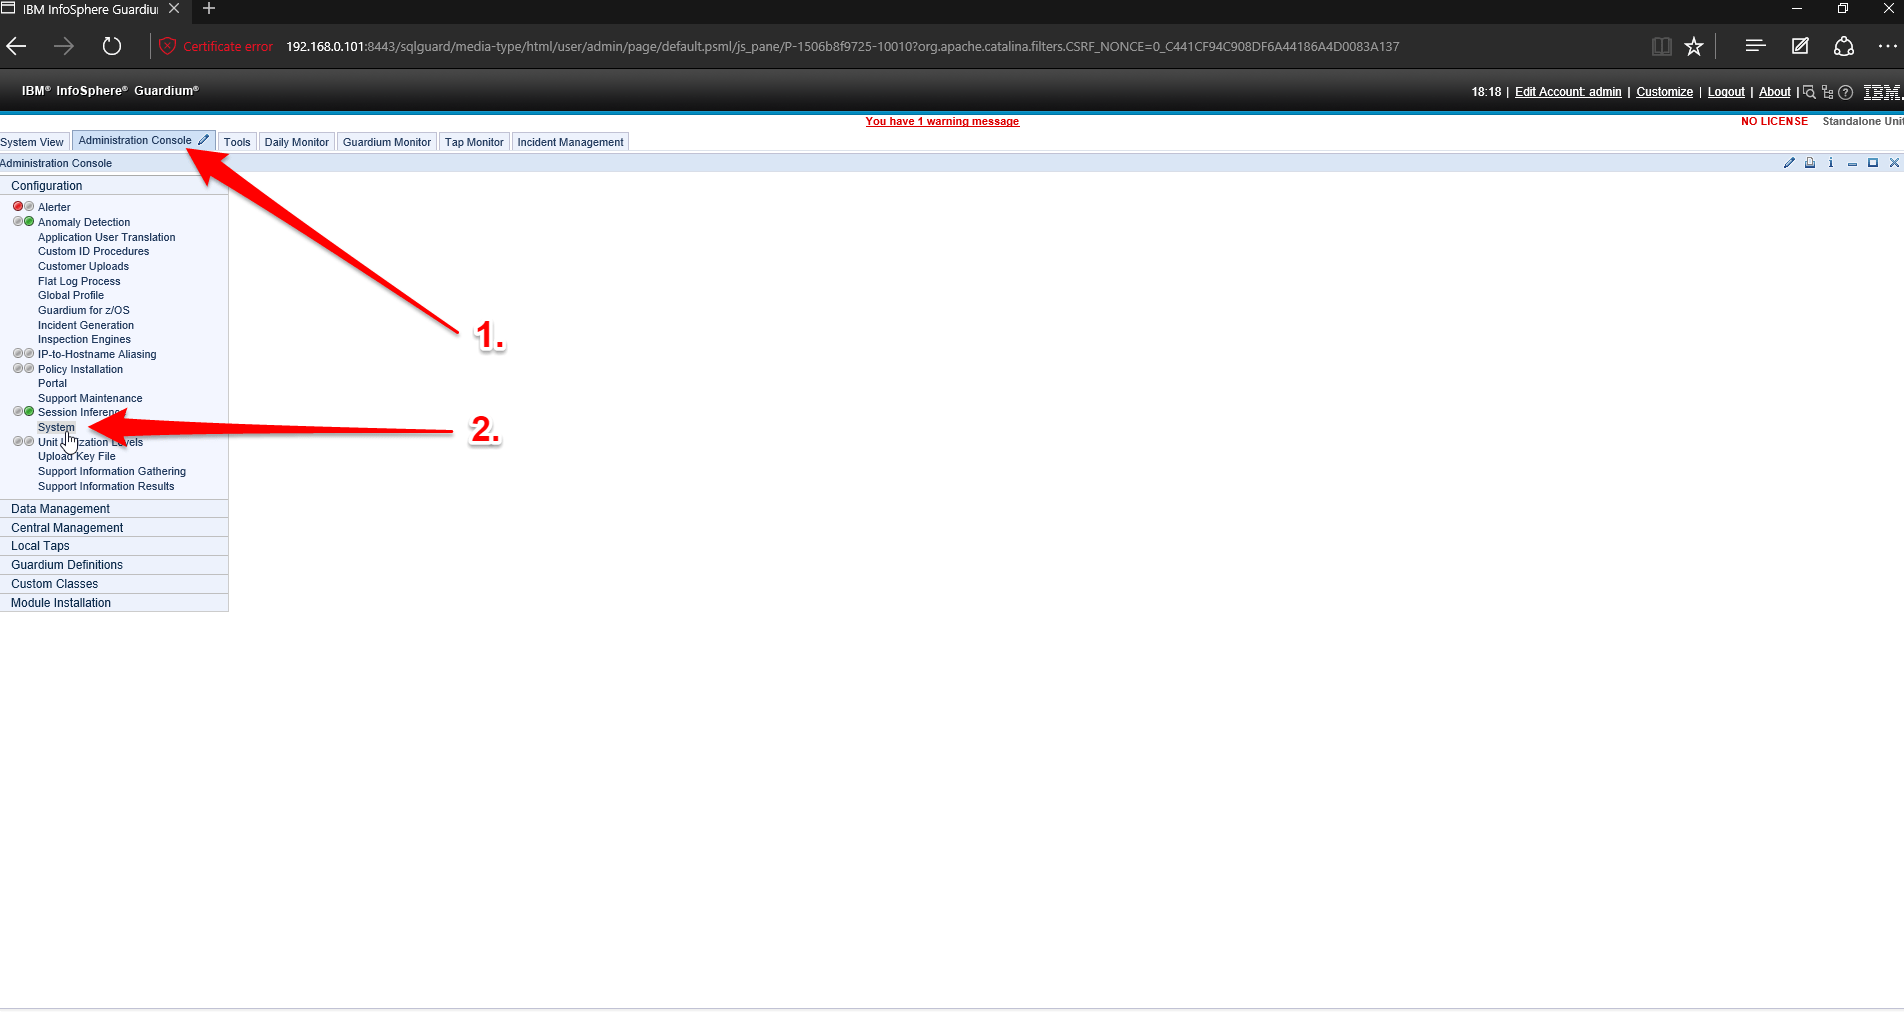
To license the Guardium Base software via the GUI – select “Administration Console” from the tabs at the top, followed by selecting “System”
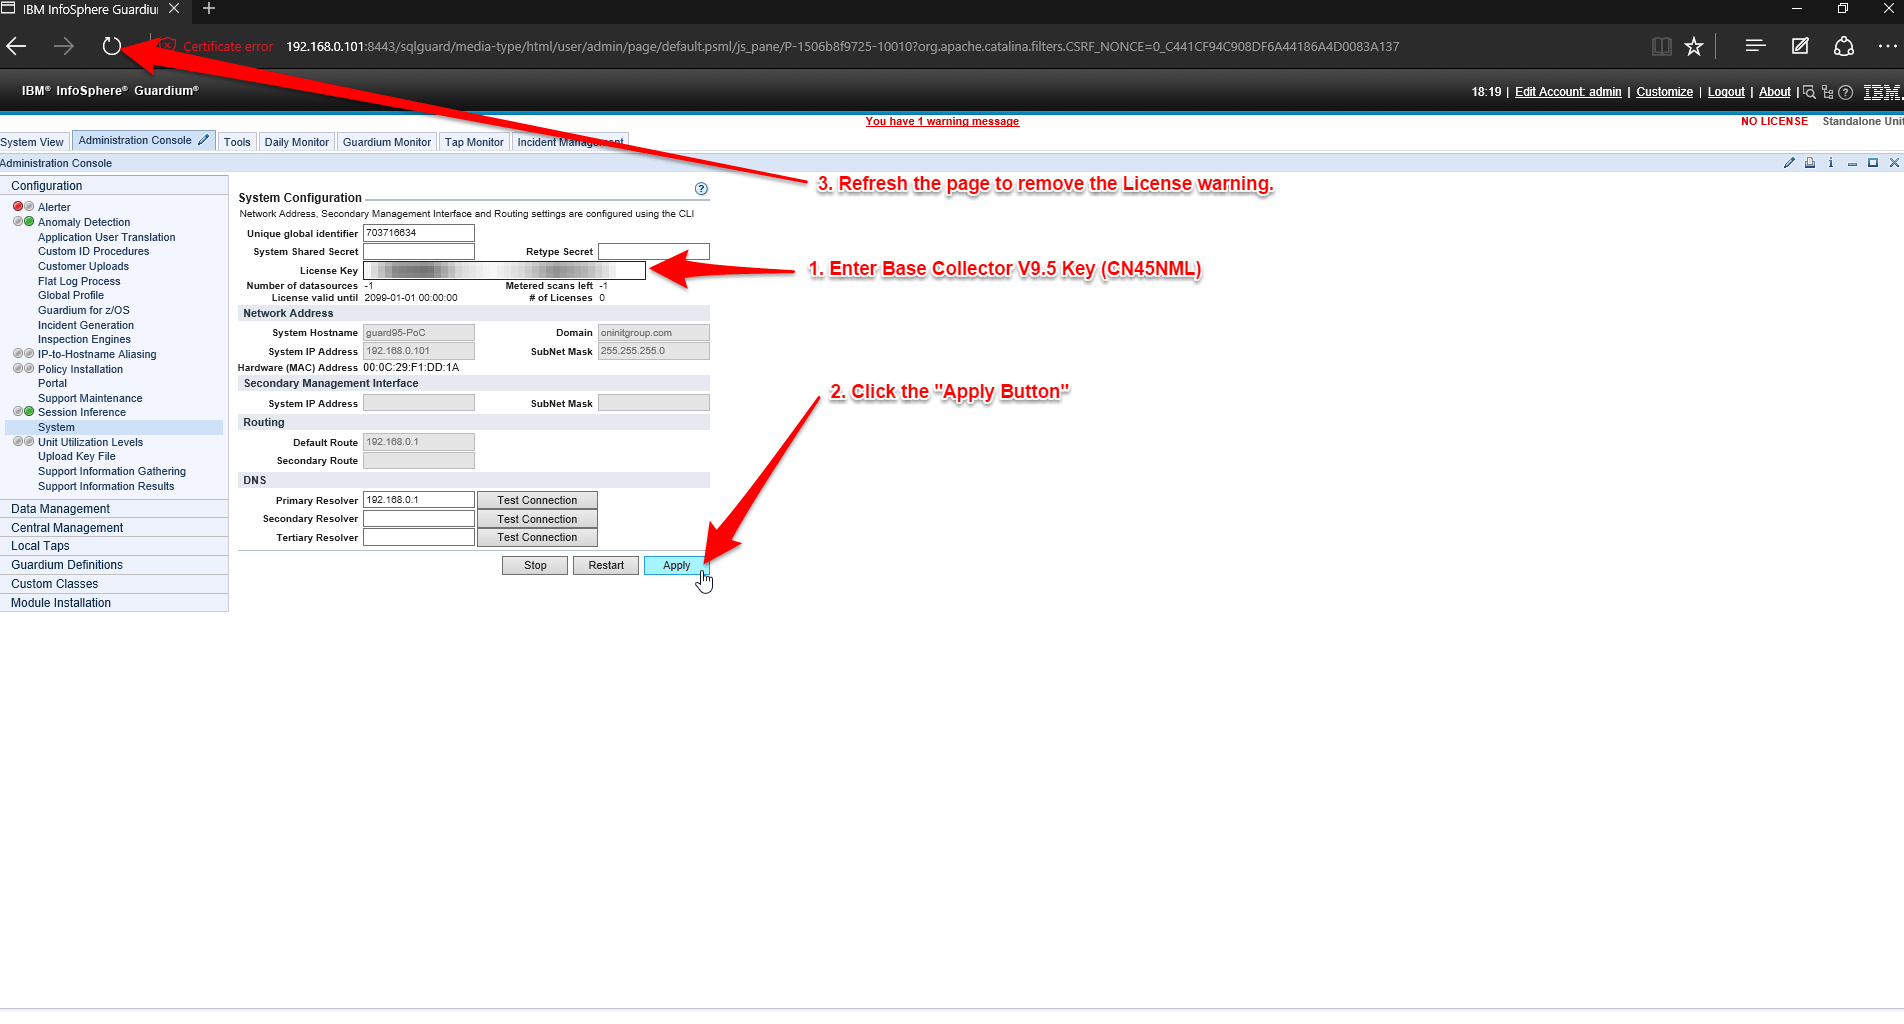
Enter the Base Collect V9.5 Key and hit “Apply”, you should see the number of licenses increase from 0. In this example 99999!
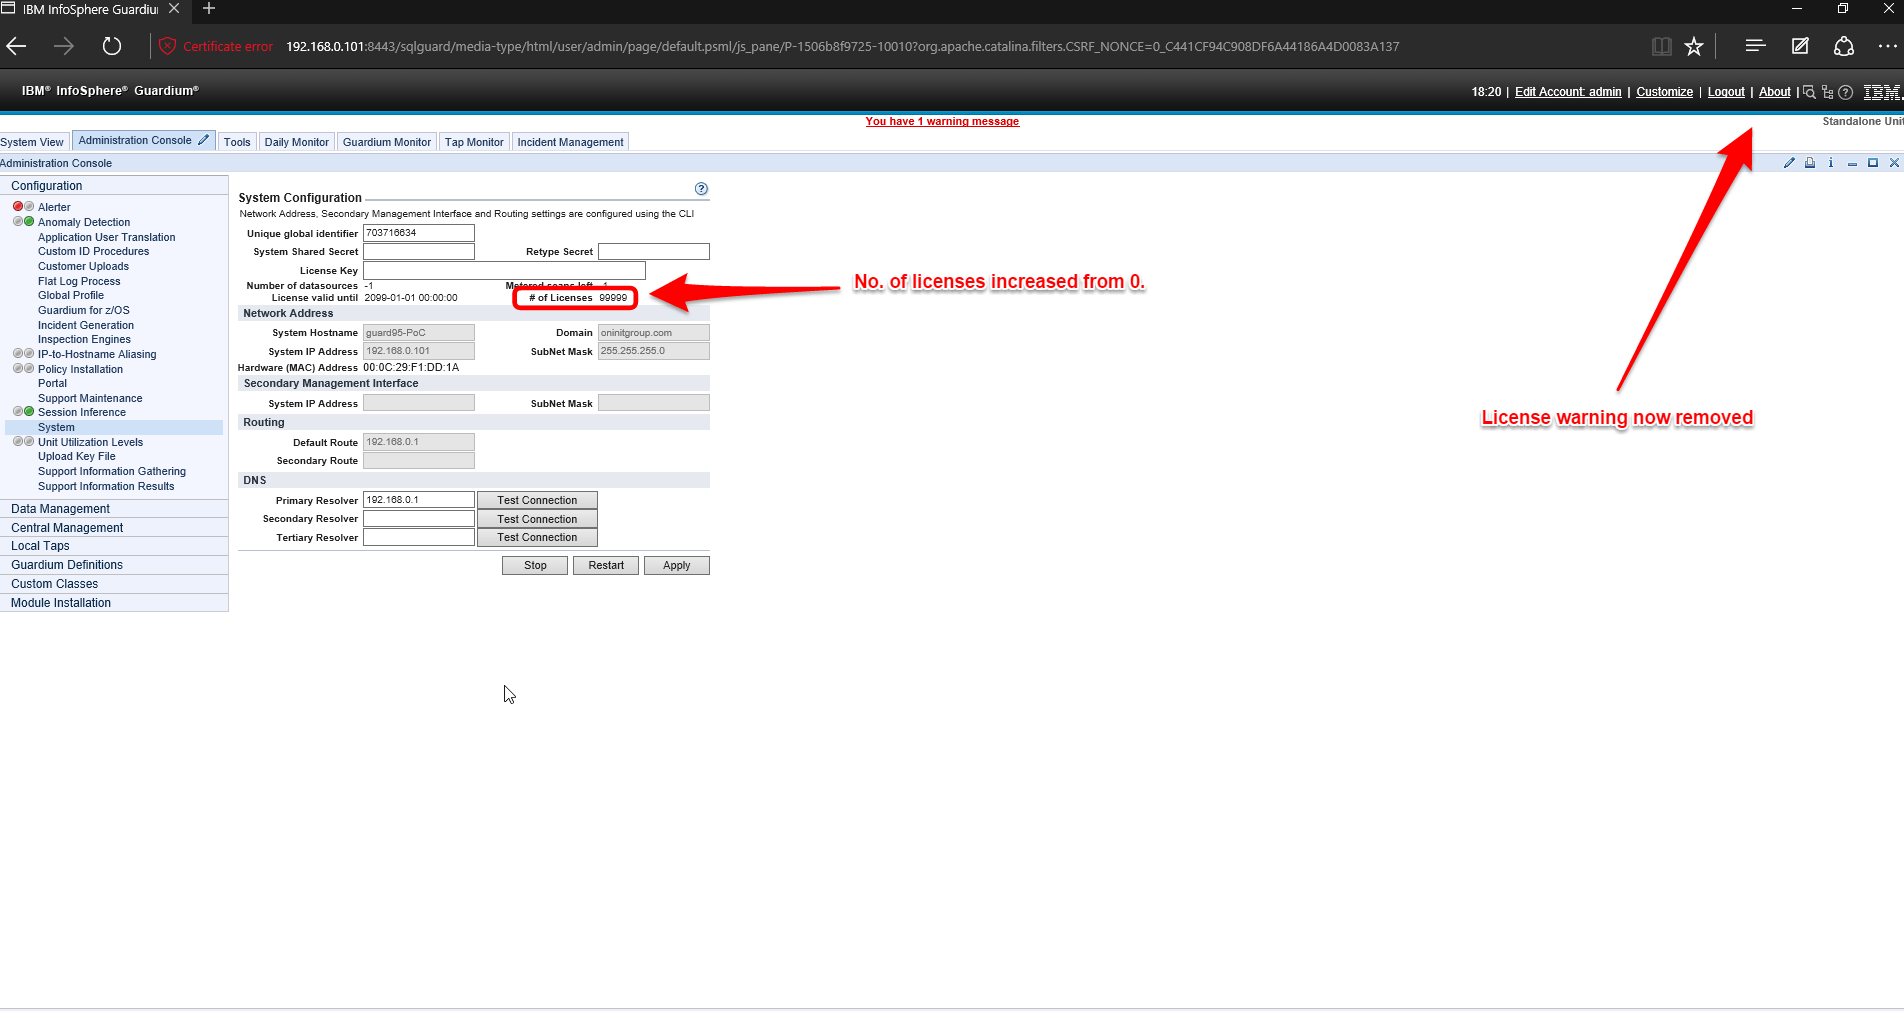
That’s it! Guardium (Base) is now installed, configured and licensed.
Conclusion:
This article has guided the reader through an IBM Guardium v9.5 VM base installation as a “Collector”, it has detailed the steps required to configure and license the software to a point where additional features can be installed.
Disclaimer:
The above is provided “as is” without warranty of any kind, either express or implied, including without limitation any implied warranties of condition, uninterrupted use, merchantability, fitness for a particular purpose, or non-infringement.
Contact us
If you have any questions regarding an IBM Guardium v9.5 VM installation and would like to find out more, simply contact us.